How to Take Care of Turtle Eggs
Taking care of turtle eggs is like being a tiny shell superhero! First, pick a cozy spot with moist, sandy soil for nesting. When you find precious eggs, handle them gently and keep their tops marked, just like a treasure map! Keep them warm and humid, around 80°F and 80% humidity, using vermiculite to cradle them. Now comes the waiting game, which can be up to 12 months! When it’s hatching time, help the little turtle pals dash safely to the water! Ready for some more super tips to keep your turtle eggs happy and healthy? Let’s go!
Table of Contents
Key Takeaways
- Select a well-drained, moist nesting site on a south or southwest-facing slope to enhance egg survival rates.
- Handle eggs gently with clean tools, marking their orientation for proper development during incubation.
- Maintain optimal incubation conditions with a temperature between 27°C to 31°C and humidity around 80-90%.
- Use cushioned containers with vermiculite for transporting eggs, protecting them from temperature swings and direct sunlight.
- Release hatchlings immediately after emergence at night or dawn to increase their chances of survival from predators.
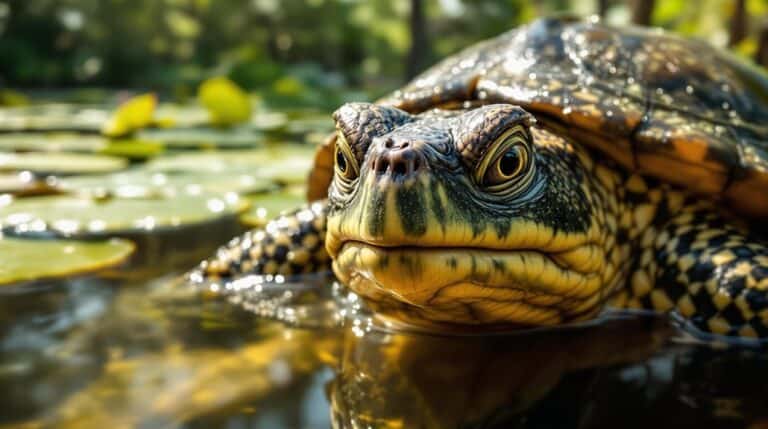
Preparing the Habitat
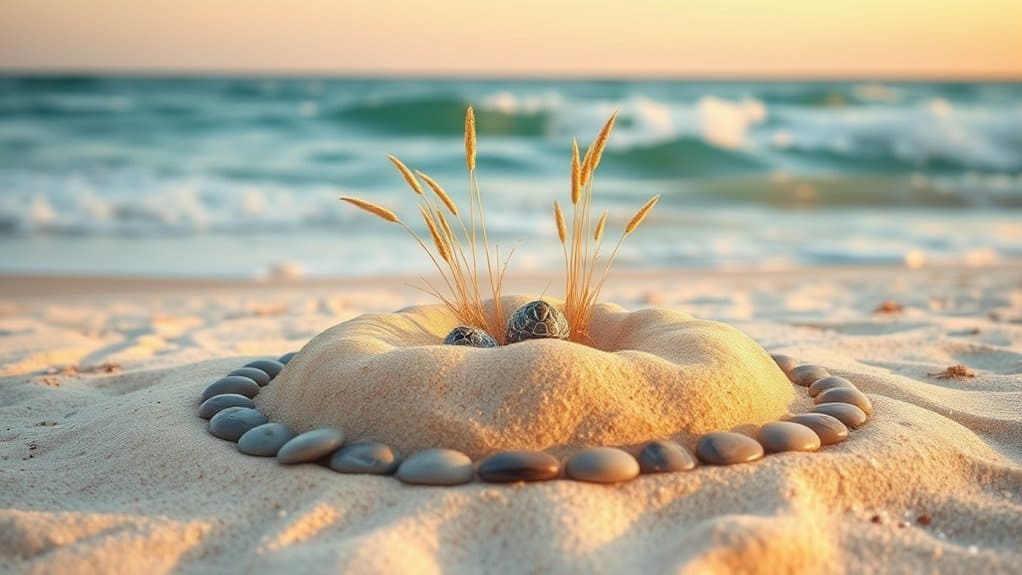
When it comes to preparing the habitat for turtle eggs, creating the right nesting site is essential for their survival. Imagine you’re a turtle, ready to lay your eggs! You’d want a cozy, warm spot, right? So, let’s talk about nesting site selection. I’ve learned that south or southwest-facing slopes are the best! They soak up the sun like a sponge, keeping the eggs nice and toasty.
Now, the soil needs to be just right—moist but well-drained, like a sponge that’s not too soggy. We’ve gotta keep those pesky predators at bay, so a little less vegetation is a smart move. Think of it like avoiding a crowded party; you want your eggs to chill in peace! Additionally, optimal moisture levels are crucial for the successful hatching of turtle eggs, so it’s important to monitor this aspect closely. It’s also beneficial to have open, exposed nesting sites as they have been shown to increase nest success rates.
And guess what? Being near water is cool, but don’t plant it right on the shore! We don’t want sneaky raccoons crashing the party. By enhancing the habitat this way, we’re giving those turtle eggs the best shot at hatching into happy little turtles. Now, let’s make sure these little guys have the freedom they deserve!
Nesting Material Selection
Nesting material selection is essential for ensuring the survival of turtle eggs. Think of it as creating a cozy little home for our turtle friends! The right substrate types can make all the difference. Turtle eggs thrive in moist, well-drained soils, like sandy gravel mixes or fluffy silt loam. Too dry? That’s a total disaster! It can lead to nest failure, like a cake that doesn’t rise.
Now, let’s talk soil drainage! Good aeration is key. Sandy or gravelly soils are like a fresh breeze for the eggs, while clay can be a real party pooper, hardening and trapping water. We want a balanced mix, just like a great smoothie! In fact, the effects of island morphology on nesting success highlight the importance of choosing the right substrate. Additionally, selecting nesting sites near impenetrable vegetation can help protect the nests from potential threats.
Next, there’s vegetation management. Too much shade can cool things down too much. We need that sun exposure for ideal temperatures! Open spots with a bit of surrounding greenery are perfect; it’s like having a sunbath with some shade for protection.
And if you’re building artificial nests, aim for a south or southwest orientation. Mix in various substrate types, and voila! You’ve created a turtle paradise! Let’s give those eggs the best chance at life!
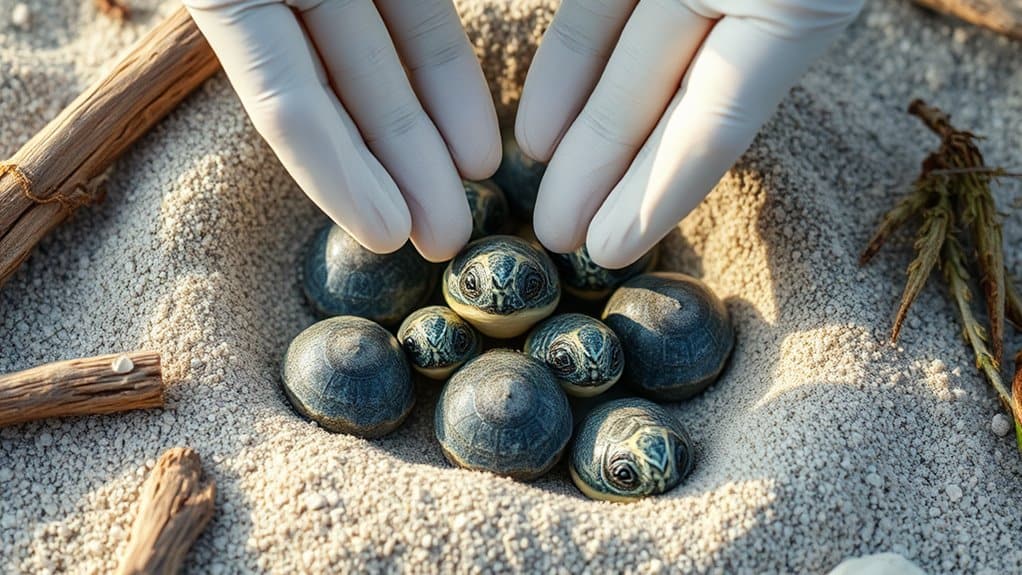
Handling and Storing Eggs
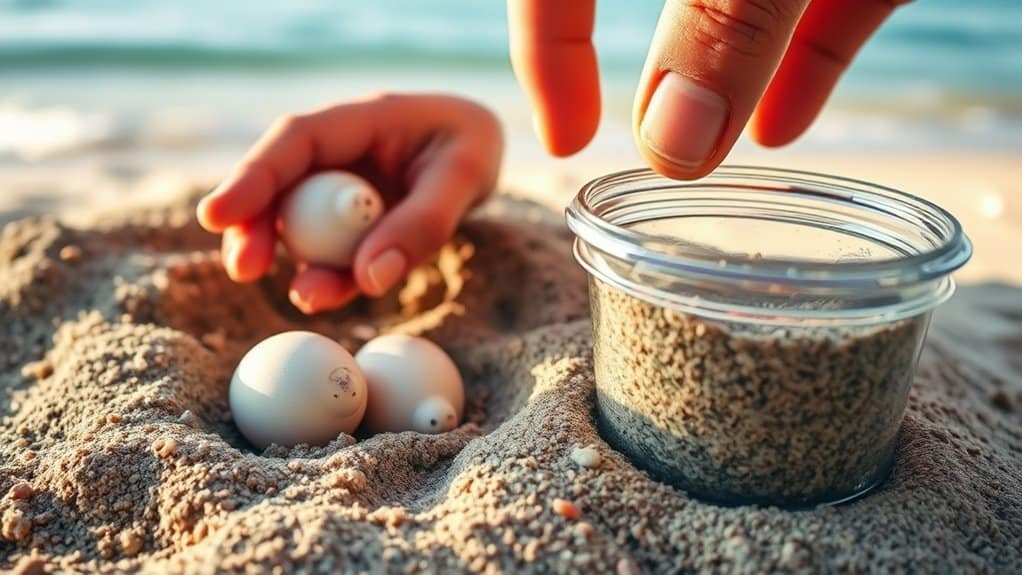
After turtle eggs are laid, it is crucial to handle and store them with care to guarantee their survival. Think of them as tiny treasures! Here’s how I make sure they’re treated like royalty:
- Careful Removal: I gently use a clean paintbrush or a small spoon to lift the eggs without any drama. They’re like delicate balloons, so I treat them with extra care. I keep them in the same position they were laid to avoid any confusion for the babies inside!
- Marking Techniques: Before moving them, I mark the top of each egg with a soft pencil. This way, I keep track of their original orientation. It’s like giving them a little compass! Additionally, it’s essential to observe that newly laid eggs exhibit a bluish-white hue which will change over time. Maintaining the proper orientation of the eggs is critical for the healthy development of the embryos inside.
- Egg Transportation: I place the eggs in a cushioned container filled with vermiculite. I whisk them away to the incubator quickly and gently, avoiding temperature swings. Just like a VIP shuttle service, I keep them safe from the sun and dryness.
Incubation Process Overview
Once the eggs are safely stored and transported, the incubation process kicks off, which is a fascinating journey for these tiny treasures. It’s like watching a magical transformation! The incubation duration can vary quite a bit—some eggs might take only 45 days, while others could stretch to 12 months! That’s like waiting for your favorite movie sequel!
During this time, the environment plays a huge role. You see, temperature and humidity can really impact how the little ones develop inside their cozy shells. Sea turtle eggs, for example, are usually round and soft, and they change color as they grow. Isn’t that cool? And if you peek inside, you can see the yolk and blood vessels—like a tiny life party! The incubation period is typically around two months, but can vary based on environmental conditions. Additionally, egg development is highly influenced by temperature-dependent development, with warmer temperatures speeding up the process.
But, oh boy, it’s not all smooth sailing! If the nest gets disturbed, it can ruin everything. So, let’s keep our fingers crossed for good vibes! As the hatchlings prepare to break free, they’ll be using a special tooth, called a caruncle, to crack open their homes. It’s a big adventure waiting to happen, and I can’t wait to see those little cuties emerge!
Maintaining Incubation Conditions

Maintaining the right conditions for turtle egg incubation is essential, as even slight variations can greatly affect the hatchlings’ development. Think of it like baking a cake; too hot or too cold, and you might end up with a gooey mess instead of a delicious treat! Here’s what you need to keep in mind:
- Temperature Regulation: Aim for that sweet spot between 27°C (81°F) and 31°C (88°F). This helps balance the boy-to-girl ratio, which is super important! The timing of emergence is influenced by season and environmental conditions, so be sure to monitor these factors closely.
- Humidity Management: Keep humidity levels between 80-90%. Too dry? The eggs could shrivel up like old raisins. Too wet? You might end up with a moldy mess that would make any chef cringe!
- Moist Substrate: The eggs need a cozy, moist environment, but don’t drown them! Just like plants, they thrive when their surroundings are damp but not soggy.
Hatching Process Details
The hatching process for turtle eggs is a fascinating journey that begins with the hatchlings making their way out of their shells. Envision this: tiny turtles using a special little tool called an egg tooth to crack open their shells! Isn’t that cool? After they hatch, they might take 3 to 7 days to dig their way to the surface. Talk about a workout!
When they finally emerge, they often do so under the cover of night. This clever move helps them dodge hungry predators, like birds, waiting for a tasty snack. You’ll see them burst out together in what we call hatching synchronization—imagine a splashy turtle party! This teamwork helps them confuse and overwhelm those predators. Interestingly, multiple nesting events can occur, allowing for a larger group of hatchlings to emerge together. Moreover, the timing of their emergence is influenced by the temperature of the sand, which can affect their gender.
Some nests have hatchlings coming out on different nights, making it a real turtle show! The thrill of watching these little creatures take their first big steps toward freedom is unforgettable. As they scurry towards the ocean, they’re ready for their next adventure. Just remember, giving them space and keeping things dark is essential for their safety. So, let’s cheer them on as they burst into the wild!
Post-Hatch Care Guidelines
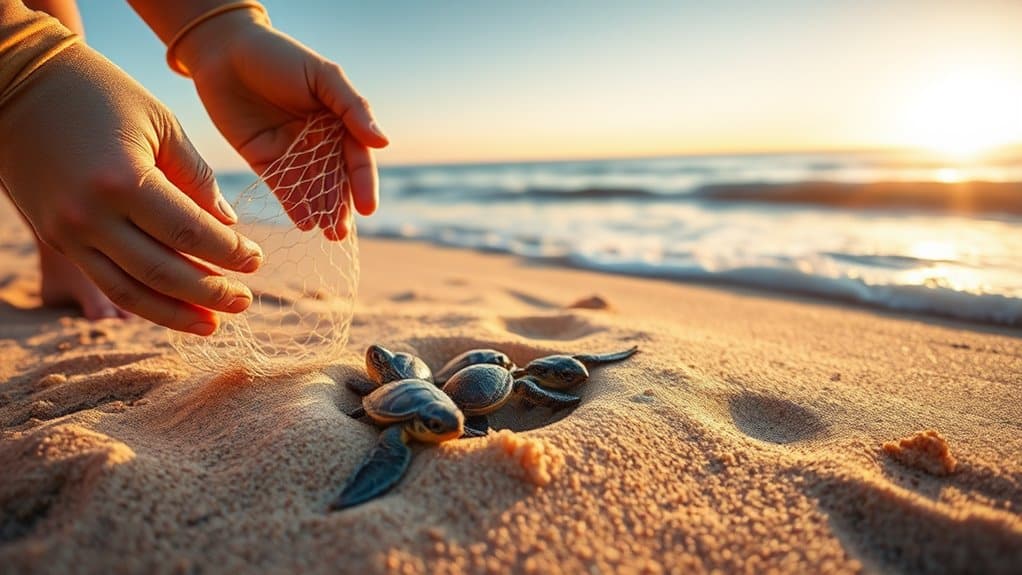
Taking care of newly hatched turtles is essential for their survival and well-being. When those little guys break free from their eggs, they need all the love and attention you can give! Here’s what to keep in mind with their post-hatch care:
- Hatchling Behavior: After emerging, avoid keeping them too long. They need to hit the beach and imprint on their home before heading to the water! Ensuring immediate release after emergence is critical for their survival chances.
- Predator Awareness: Protect them from sneaky predators! Make sure their habitat is safe and cozy, with a damp cloth or sack if they can’t be released right away. Additionally, proper nutrition is crucial for their growth and development, so ensure they receive a high-protein diet as they transition to their new environment.
- Release Strategy: Night or dawn releases are best. This way, they avoid the harsh sunlight and have a better chance of finding their way safely!
Keep them moist with wet towels, and monitor their energy. If you notice any early birds, let them go without waiting for others. Remember, these little turtles are on a mission! The quicker they get to the ocean, the more likely they’ll thrive. Let’s give them the ultimate freedom to swim into their new lives!
Common Issues Faced
Once the hatchlings have made their way to the ocean, it’s important to recognize that turtle egg care doesn’t stop with their emergence. You see, common issues can pop up like surprise guests at a party! First, there’s egg binding. If a mama turtle can’t lay her eggs, it can get super serious! Calcium deficiency can sneak in, making things even trickier. Trust me, we want those turtles to thrive, not just survive! Additionally, females can produce 2-3 clutches in a single season, which can be taxing on their bodies.
Stress management is key, too. If turtles feel stressed, it can lead to all sorts of problems. It’s like trying to study for a test while someone blasts music—no good! Plus, we’ve got to watch out for disease prevention. Keeping everything clean is a must; we don’t want any pesky germs crashing the hatchling party. Furthermore, turtles explore land to find suitable laying spots, and if they can’t find the right environment, it can affect their egg-laying success.
And oh, malformed eggs! They’re like the unfortunate fruit in a perfect basket. Handling eggs gently and with care helps avoid these issues. So, let’s keep an eye on temperature and humidity, ensuring our little buddies have the best chance for a bright future. After all, every turtle deserves a smooth ride to the ocean!
Species-Specific Considerations
When it comes to turtle egg care, understanding the nuances of different species is essential. Each turtle has its quirks, and knowing these can lead to happy hatchlings! Let’s explore three key considerations:
- Temperature Management: For many turtle species, the magic temperature range is between 25°C and 33°C. If it gets too hot—over 34°C—those little embryos might not make it. Plus, warmer temperatures often mean more female hatchlings. Isn’t that wild?
- Humidity Control: Aquatic turtle eggs love a humid hug, needing about 80% humidity to thrive. Sea turtle eggs? They’re true humidity enthusiasts! But some terrestrial turtles might prefer a drier setup. It’s all about replicating their cozy nests!
- Nesting Environment: Sea turtles dig complex nests in sandy beaches, while aquatic turtles might need a water-filled space. Each species has its nesting style, so don’t forget to cater to their preferences!
Ensuring Healthy Growth
Ensuring healthy growth for turtle hatchlings involves a careful balance of environmental conditions and attentive care. It’s like being a turtle parent, and trust me, it’s super exciting! First, let’s talk about embryo development. Those little eggs need to be treated like delicate treasures! Handle them gently, and never flip them over. They’re already on a journey, and we don’t want to stunt their growth!
Now, for the perfect incubation setup, aim for about 80℉ and 80% humidity. Think of it as creating a cozy spa for your soon-to-be hatchlings! Use vermiculite or sphagnum moss to cradle those eggs like a cloud. And don’t forget to check on them regularly, but resist the urge to poke or prod. They’re busy growing, after all!
Once they hatch, it’s time for a grand welcome! Move them to a moist enclosure lined with wet towels, so they feel right at home. Keep the vibe humid for aquatic turtles, and give them tasty treats like waxworms to fuel their adventure! With the right care and attention, you’ll be showering those little ones with love while they grow strong and free! Isn’t that just the best?
Conclusion
So, there you have it! Taking care of turtle eggs might feel like a big deal, but it’s just like hosting a tiny, shell-covered party—everyone’s invited! You’ve got the habitat, the eggs, and the magic of incubation all set. Just remember, turtles aren’t exactly speedy, so patience is key. Soon enough, you’ll be welcoming the cutest little party crashers into the world. Who knew being a turtle parent could be this much fun? Go ahead, show those eggs some love!